*413 903   

Davies Craig

EWP80 Alloy Flange - Remote Electric Water Pump (12V)

The EWP®80 Alloy Flange configuration mirrors the highly successful EWP®80 Nylon pump first released in 1999. Key specs: 90 L/min (23.8 US gal/min) @ 0 kPa flow rate; 7.5A @ 13V max current.

New product

Available on order : 10+psc

At the latest: 12. 10.

171,30 € tax incl.

8106   

9311669081066

Enquiry product

Enquiry product

EWP80 Alloy Flange - Remote Electric Water Pump (12V)

EWP80 Alloy Flange - Remote Electric Water Pump (12V)

The EWP®80 Alloy Flange configuration mirrors the highly successful EWP®80 Nylon pump first released in 1999. Key specs: 90 L/min (23.8 US gal/min) @ 0 kPa flow rate; 7.5A @ 13V max current.

Send the question to the owner of the store, about this product.

* Required fields

  or  Cancel

Notify me about the stock

EWP80 Alloy Flange - Remote Electric Water Pump (12V)

EWP80 Alloy Flange - Remote Electric Water Pump (12V)

To be informed about product update via email, fill out the form.

* Required

  or  Cancel

The EWP®80 Alloy Flange configuration mirrors the highly successful EWP®80 Nylon pump first released in 1999. Key specs: 90 L/min (23.8 US gal/min) @ 0 kPa flow rate; 7.5A @ 13V max current.

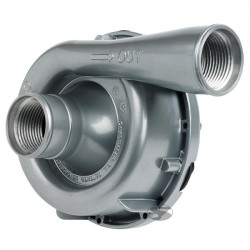
The EWP80 Alloy Flange configuration mirrors the highly successful EWP80 Nylon pump first released in 1999. It provides a maximum flow rate of 90 l/min and will fit most vehicle engines up to two litres as an alternative to the mechanical belt-driven pump or as an auxiliary pump.

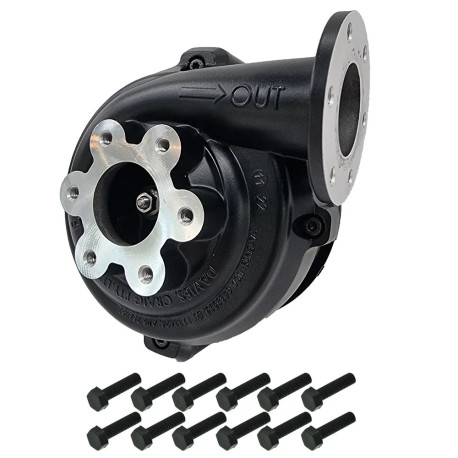
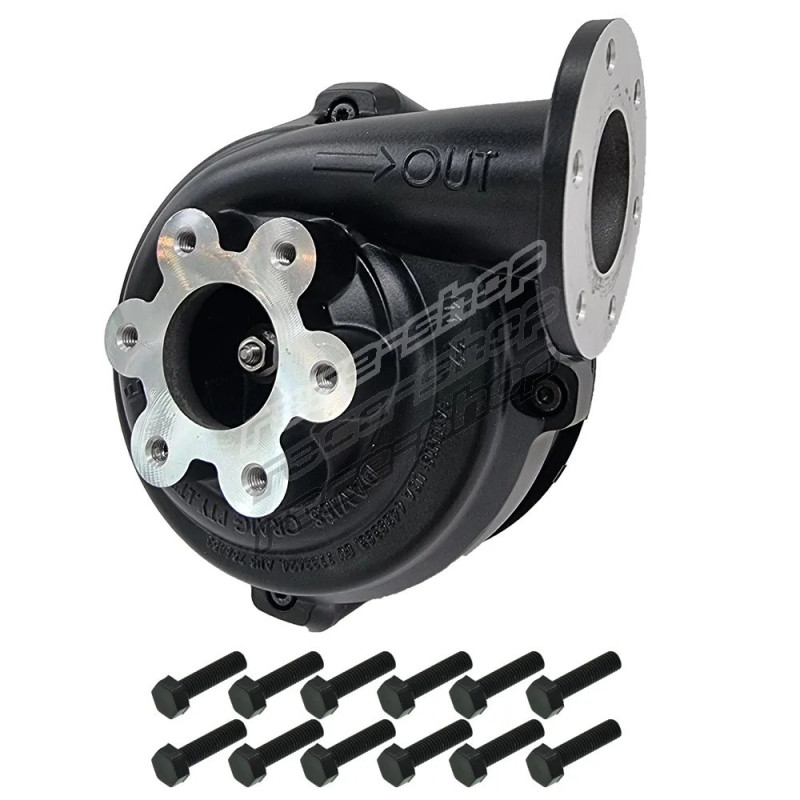
This compact pump is manufactured out of lightweight Aluminium and utilises 6 bolt flange fittings for superior fitment flexibility. Arriving in a magnificent matt-black powder-coated finish, it provides up to 10kW (13hp) of extra power and increased torque. Used extensively in Intercooler applications.

Purchase options

  • Option: Pump Only; Part DC: DC8106; Notes: EWP® 80 Alloy Flange 12V pump only (see contents below).
  • Option: Kit; Part DC: DC8006; Notes: EWP® 80 Alloy Flange 12V kit with basic wiring essentials.
  • Option: Combo with Controller; Part DC: DC8908; Notes: Combo pack with controller solution (controller also available separately).

Contents (Part DC8106)

  • EWP® 80 - Alloy Flange: 1
  • 5x12 Flanged Hex Set Screw Zinc Silver: 12
  • Installation Instructions: 1

Technical specifications

  • Operating voltage: 12V DC (16V Max)
  • Max Current: 7.5A @ 13V
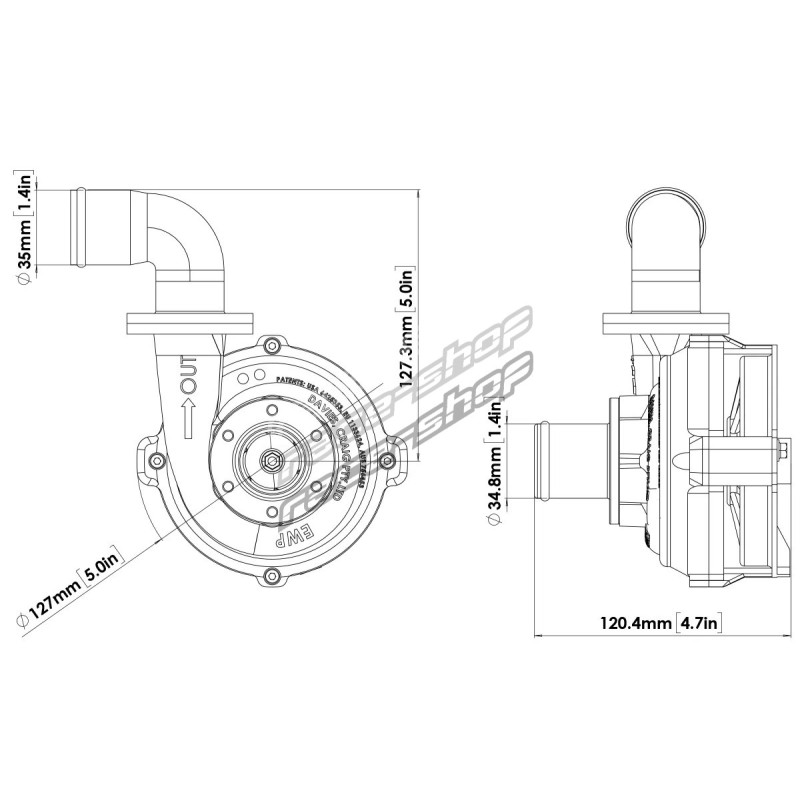
  • Flow rate (max): 90 L/min (23.8 US gal/min)
  • Maximum Head Height: 5.2m (17ft 0.72in)
  • Operating / Fluid temp.: -40° to 120°C (-40° to 248°F)
  • Pump design: Clockwise centrifugal with volute chamber
  • Pump weight: 1100 grams (2.43 lb)
  • Motor / Body: Brushed DC / Aluminium
  • Burst pressure: 500 kPa (72.52 Psi)
  • Inlet & Outlet: 6 Bolt Flange / 35mm barb
  • Hose Fitment: 32mm to 50mm (with optional sleeves)

Installation demonstration & controller overview

EWP & Controller Installation Demonstration

Combined with an LCD EWP/Fan Digital Controller (Sold separately Part DC8002 or EWP Combo Pack) will manage both the EWP and Thermatic fan operation. The Digital Controller will vary the speed of the EWP in response to the engine’s coolant temperature. Multiple temperature settings are provided on the Controller for either maximum power or fuel efficiency.

Key benefits

The world’s most advanced total engine cooling management system:

  • universal fit
  • more power
  • more cooling
  • increase fuel efficiency
  • extend engine life
  • world-leading technology

EWP® installation options

Installing an EWP® as an AUXILIARY PUMP

  • Leaving the mechanical water pump in place, install the EWP into the bottom radiator hose.
  • Remove the thermostat and drill two approx. 3mm (1/8") holes in the thermostat plate to allow some coolant circulation when the thermostat is closed. Re-install ensuring that the thermostat housing is clean and a new gasket is used if required.

EWP® INSTALLATION – disabling Mechanical water pump

  • Leaving the mechanical water pump in place, install the EWP into the bottom radiator hose and remove the manufacturer’s thermostat.
  • You will need to bypass the water pump pulley by installing an appropriate length belt (not supplied). This method makes for an easy installation.
  • If running the pump continuously remove the thermostat and drill two approx. 3mm (1/8") holes in the thermostat plate to allow some coolant circulation. Re-install ensuring that the thermostat housing is clean and a new gasket is used if required.

In both these cases, the EWP will pump past the impeller of the mechanical water pump.

Disengaged mechanical water pump (recommended)

  • Remove the mechanical water pump and remove the thermostat.
  • Then remove the impeller from the mechanical pump shaft. Retain the mechanical water pump using the pump pulley as an idler to avoid re-routing the drive belt.
  • Block any bypass passages and re-install the disengaged water pump ensuring that all gasket surfaces are clean and the new gaskets are properly fitted to prevent leaks.
  • Install the EWP into the bottom radiator hose.

Removed mechanical water pump (Ideal)

  • Remove the mechanical water pump and thermostat from the engine.
  • Install a Davies Craig EWP Header Adaptor or blanking plate (not supplied). Ensuring the gasket surfaces are clean and the appropriate gasket or sealant is used to prevent leaks.
  • Install the EWP into the bottom radiator hose. This method will require you to modify or replace the standard radiator hose.
  • Install an appropriate length belt (not supplied) to drive the accessories.

In most cases EWP® will be adequately supported by the radiator hose. Where mounting is required, the EWP® must be soft mounted to protect against vibration. For the EWP® 115, EWP® 140 and EWP® 150 Part DC8700 or DC8710 Mounting bracket is recommended.


Write a review

Write a review


  or  Cancel

Did not find your question?
Enter new question
Do you have a question? Search for an answer.


makeModelyear
FordCortinaTE, 4 Cyl | 1977-1980
FordCortinaTE, 6 Cyl | 1977-1980
FordCortinaTF | 1980-1982
ToyotaHiAceKZH100 | 1993-1995

Recent posts

RWD POWER Displays

Motorsport displays for monitoring engine parameters
Read more
How to choose alloy wheels for your car?

Information and important terms that every car enthusiast should know to choose the right wheels.
Read more
Modification of the M52B28 engine

How to increase the performance and reliability of one of the most popular BMW engines?
Read more
RACE-SHOP MEET & GREET 3

We took it to the next level!
Read more
Príprava auta na letnú sezónu

Rising temperatures bring the opportunity to prepare your car for the summer season. What to improve and what to watch out for?
Read more
Fuel pressure regulator and Wastegate

What are they for and what benefits do they bring?
Read more
Vehicle modification: BMW E36

Unlock your car's potential.
Read more
Modular floor

Modular floor for garage or workshop.
Read more
Aero Tec Laboratories Ltd (ATL)

More than 50 years in the field of fuel tanks for top motorsport.
Read more

Categories Manufacturers

Loading...